banner


Where To Repair Ipod 5th Generation

Introduction

Use this guide to replace the home push in your iPod Touch.

  1. If your display glass is cracked, keep further breakage contained and prevent bodily harm during your repair by taping the glass. Lay overlapping strips of clear packing tape over the iPod's display until the whole face is covered. This will keep glass shards contained and provide structural integrity when prying and lifting the display.

    • If your display glass is croaky, keep further breakage independent and prevent bodily impairment during your repair by taping the glass.

    • Lay overlapping strips of clear packing tape over the iPod's display until the whole face is covered.

    • This will go along glass shards contained and provide structural integrity when prying and lifting the brandish.

    • Habiliment safety spectacles to protect your eyes from any glass shaken free during the repair.

  2. Use a hairdryer or prepare an iOpener and apply it to the lower edge of the iPod for about a minute in order to soften up the adhesive underneath. The bottom of the screen (near the home button) is held in place with strong adhesive.

    • Utilise a hairdryer or prepare an iOpener and apply it to the lower edge of the iPod for about a infinitesimal in gild to soften upwards the adhesive underneath.

    • The bottom of the screen (nigh the home push button) is held in place with strong agglutinative.

    • As you start prying the screen off in the side by side stages, you lot may need to apply more heat to go on the glue warm and flexible.

  3. Center the suction cup on the lower section of the glass, with its edge centered over the home button. Press in firmly and make sure the cup has a strong seal.

    • Center the suction cup on the lower section of the drinking glass, with its edge centered over the home button.

    • Press in firmly and make sure the cup has a strong seal.

  4. Hold the iPod firmly against a table or bench. Place your thumb and index finger over the lower corners of the display to stop the display from opening too far when the adhesive breaks. Lift the suction cup up and back toward the top of the iPod. Be patient, and pull with firm, constant force until the adhesive breaks and the display comes up from the rear case.

    • Agree the iPod firmly against a tabular array or demote.

    • Place your thumb and index finger over the lower corners of the display to finish the brandish from opening too far when the adhesive breaks.

    • Lift the suction cup up and back toward the top of the iPod. Exist patient, and pull with firm, constant force until the adhesive breaks and the display comes up from the rear case.

    • It may be necessary to employ a heat gun to soften the adhesive (specially in cooler climates). If yous can pry the screen apart, and the agglutinative is nevertheless sticking and pulling apart like cheese topping on a pizza, y'all can slide a thin razor blade in and gently cut the agglutinative.

    • Afterward the display begins to elevator from the rear case, be careful not to lift more than than nearly an inch—a delicate plastic frame even so connects the display associates to the rear case.

  5. In the following steps, you will be loosening and freeing the plastic frame that surrounds the screen. It is connected to the rear case with several clips. Starting at the top right of the device, insert a plastic opening tool into the gap between the plastic frame and the aluminum rear case. Slide the tool down this crack, loosening the frame from the case.

    • In the following steps, you volition exist loosening and freeing the plastic frame that surrounds the screen. It is connected to the rear case with several clips.

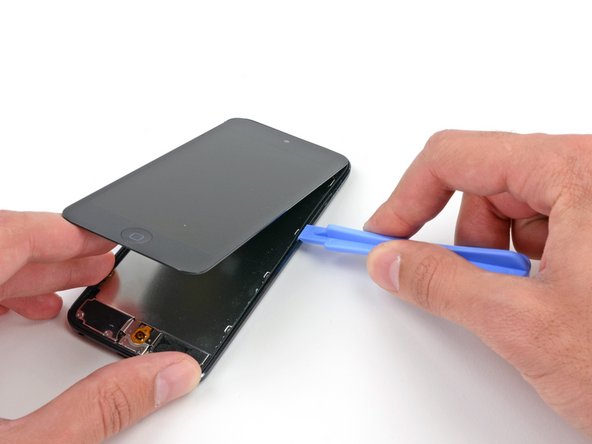
    • Starting at the elevation right of the device, insert a plastic opening tool into the gap betwixt the plastic frame and the aluminum rear case.

    • Slide the tool down this crack, loosening the frame from the example.

  6. Insert the plastic opening tool between the frame and the rear case behind the first clip. Rock the tool sideways, to spread the gap behind the clip and separate it from the rear case.

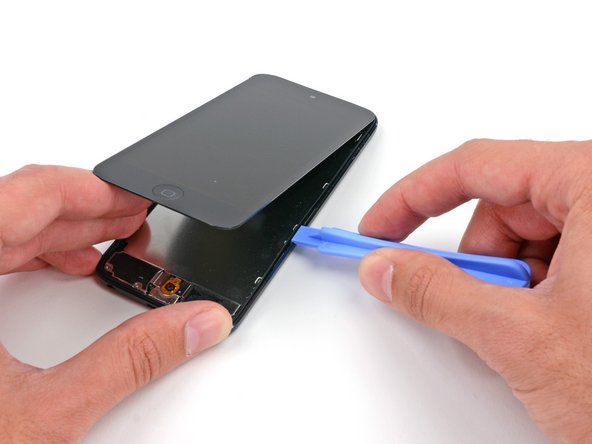
    • Insert the plastic opening tool between the frame and the rear case backside the first clip.

    • Rock the tool sideways, to spread the gap backside the clip and carve up it from the rear case.

    • This may non gratuitous the clip initially, but repeating the procedure for each prune volition begin to loosen the piece.

  7. Repeat the procedure with the next two clips on this side. You may have to go back and forth between the clips to free all of them. Take your time and be careful and patient, as the plastic frame is quite fragile.

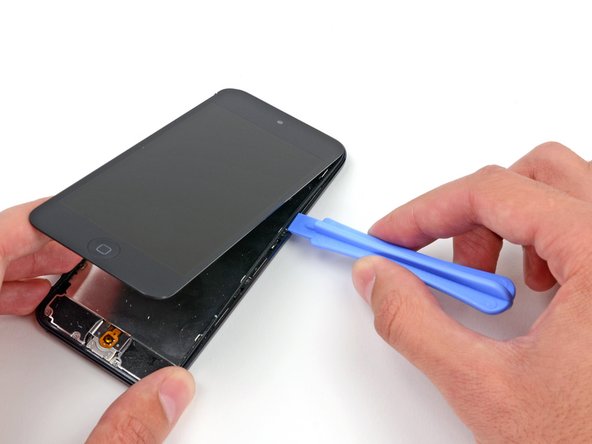
    • Repeat the procedure with the side by side 2 clips on this side.

    • You may have to go dorsum and forth between the clips to complimentary all of them. Take your time and exist conscientious and patient, every bit the plastic frame is quite fragile.

  8. Moving on to the left side of the device, insert a plastic opening tool into the gap between the plastic frame and the aluminum rear case near the top. Slide the tool down this crack, loosening the frame from the case. Slide the tool down this crack, loosening the frame from the case.

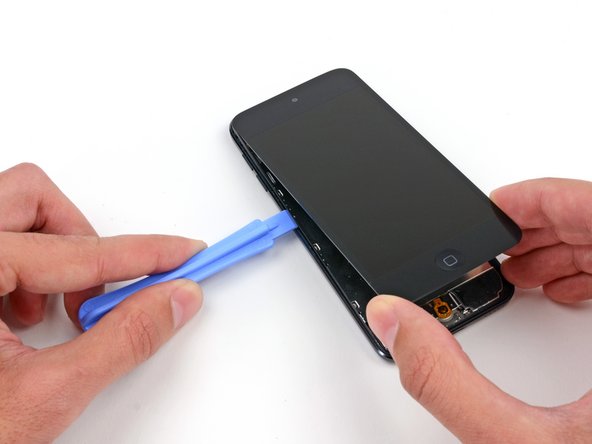
    • Moving on to the left side of the device, insert a plastic opening tool into the gap betwixt the plastic frame and the aluminum rear case virtually the peak.

    • Slide the tool down this crack, loosening the frame from the case.

  9. Insert the plastic opening tool between the frame and the rear case behind the first clip on the left side. Rock the tool sideways, to spread the gap behind the clip and separate it from the rear case.

    • Insert the plastic opening tool between the frame and the rear case behind the first prune on the left side.

    • Rock the tool sideways, to spread the gap backside the clip and separate it from the rear example.

  10. Repeat the procedure with the next two clips on this side. Insert the plastic opening tool between the plastic frame and aluminum rear case behind the second clip.

    • Repeat the process with the next 2 clips on this side.

    • Insert the plastic opening tool between the plastic frame and aluminum rear case behind the 2nd clip.

    • Rock the tool sideways, loosening the clip from the case.

  11. Using the same procedure, loosen the last clip securing the plastic frame to the rear case. Using the same procedure, loosen the last clip securing the plastic frame to the rear case.

    • Using the same procedure, loosen the last clip securing the plastic frame to the rear case.

  12. Insert the plastic opening tool between the display assembly and the rear case near the top of the iPod. Slightly twist the opening tool to pry the front panel up from the rear case. Separate the display assembly from the iPod.

    • Insert the plastic opening tool between the display associates and the rear example near the top of the iPod.

    • Slightly twist the opening tool to pry the front end panel upwards from the rear case.

    • Separate the brandish associates from the iPod.

    • Do not endeavour to completely remove the front console, as it is still continued by several cables.

  13. Being careful not to rip any ribbon cables still connecting the two halves of the device, lay the display assembly flat so you can access the back of the home button. Use a plastic opening tool to pry the rubber membrane up from around the home button. Use a plastic opening tool to pry the rubber membrane up from around the home button.

    • Being careful not to rip whatsoever ribbon cables still connecting the 2 halves of the device, lay the brandish assembly flat and then you lot tin can access the back of the home button.

    • Employ a plastic opening tool to pry the safe membrane up from effectually the home button.

  14. Once you've pried enough to tilt the button up and grab it, gently lift it up from the display assembly, pulling slowly to avoid tearing the rubber. Remove the home button from the iPod.

    • Once you've pried enough to tilt the button up and take hold of it, gently lift it upward from the display assembly, pulling slowly to avoid tearing the rubber.

    • Remove the home button from the iPod.

Conclusion

To reassemble your device, follow these instructions in reverse club.

Squad

Embed this guide

Choose a size and copy the lawmaking beneath to embed this guide as a small widget on your site / forum.

Preview

Where To Repair Ipod 5th Generation,

Source: https://www.ifixit.com/Guide/iPod+Touch+5th+Generation+Home+Button+Replacement/11908

Posted by: wicknessichaved1968.blogspot.com

Related Posts

0 Response to "Where To Repair Ipod 5th Generation"

Post a Comment

Iklan Atas Artikel

Iklan Tengah Artikel 1

Iklan Tengah Artikel 2

Iklan Bawah Artikel