

How To Make Repairs On Ceiling Knock Down Finish
Have water damaged textured ceilings or need to patch a hole? Nearly every wall develops flaws at some point, only you can perfectly repair a textured ceiling with these tips and step by step instructions.
I will be the kickoff to admit that I may not exist the biggest fan of textured ceilings. While they hide imperfections extremely well, textured ceilings attract dust and are more than difficult to paint and repair.
But in that location are the memories! I tin remember staring up at ours and seeing different images in them – sort of like cloud watching. Mostly flowers or stars, but occasionally a witches cruelly smiling face or Snoopy laying atop his canis familiaris firm.

At present removing a textured ceilings in large rooms can be a very big job. This house is going up for sale, so repairing spots is much more than manageable. We love repairing older homes including repairing baseboards, painting kitchen cabinets, and total bath remodels , and then this was i of our easier jobs!
The specific texture can exist a challenge to replicate and match to the surrounding textured surface. Just I'm showing y'all it is pretty like shooting fish in a barrel in one case you lot become the right tools!
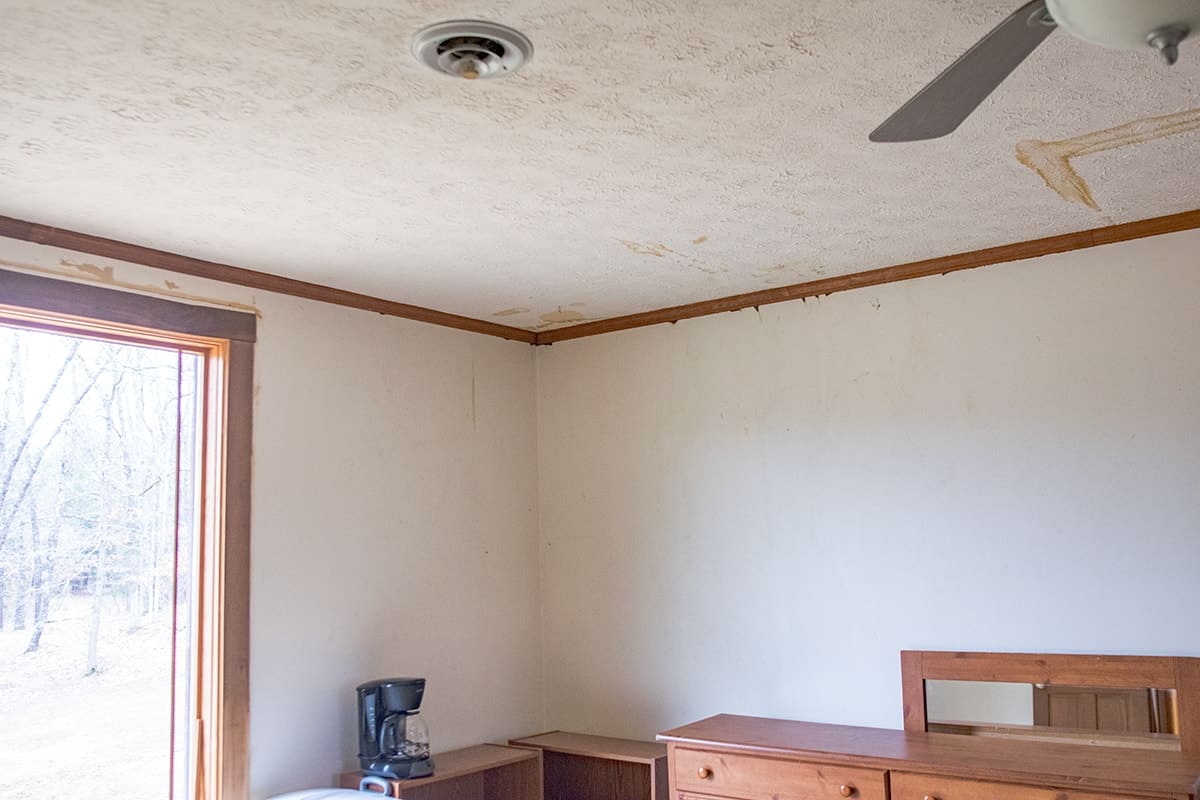
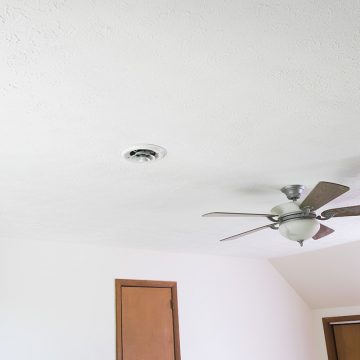
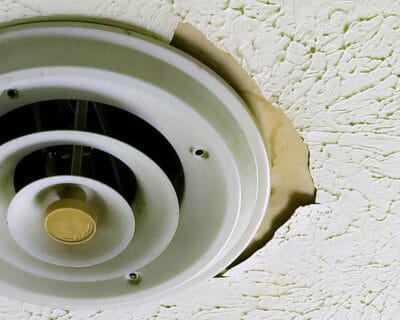
In our instance, the damage was from a leaky roof several years agone. The roof had been replaced and there was no mold, so at present information technology was time to repair the ceiling.
How to Hibernate Ceiling Stains
Beginning, not all water damage requires removing or patching the ceiling. Some damage tin can just be water stains if the ceiling texture isn't chipping, falling or molding. In those cases, use an droplets sealer similar my favorite from Kilz. This sealer hides discoloration and stains similar fume, h2o stains, and cooking oils.
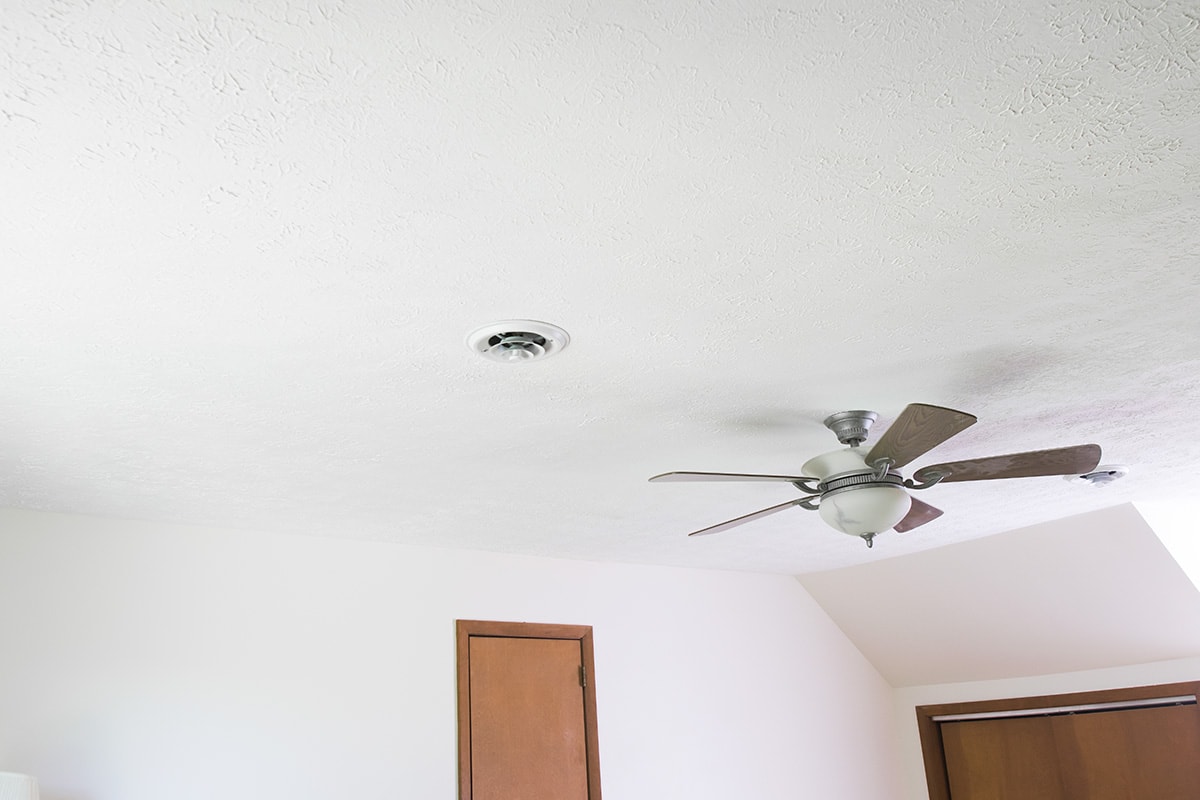
Subsequently the sealer dries, paint the area with ceiling paint. You lot will probably have to pigment the entire ceiling since it tin can be difficult to lucifer the previous color.
Ceiling Texture Types
Repairing a hole or harm to a textured ceiling depends on your ceiling texture blazon. Types of ceiling texture include
- Knockdown texture
- Orange pare texture
- Crow's foot
- Popcorn
The single hardest part of this job is figuring out which ceiling texture type you lot accept. Hither is a handy list of ceiling texture types and the tools used to create them:

Observe them by clicking the respective number:
1 | 2 | 3 | iv | 5 | 6 | 7 | eight | 9 | x
Now, this list is by no means comprehensive. There are as many ceiling textures types as there are people who create them. Feel costless to ask any questions if you have a particular type of ceiling texture.
Stride past Step Instructions
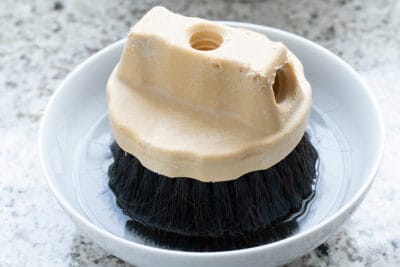
1. Soak Ceiling Texture Castor
With the exception of the orange pare and popcorn ceilings, all of the other textures use joint compound and corresponding castor to create the pattern. For brush textures, soak the brush in warm h2o for at to the lowest degree an hour, or overnight. This softens the bristles to create the correct texture for your ceiling.
2. Prepare the Surface
Remove any loose ceiling texture from the one-time ceiling and repair holes. I normally observe that if you can get nether it with a putty knife, it will come up off pretty easily.
If you lot have any h2o damage, I highly recommend using a stain blocker like this spray stainblocker to keep the old water damage from bleeding into paint.
Pro Tip: The 1 matter I effort to do when patching a textured ceiling is to make sure I don't accept whatever long, straight lines betwixt the old and new. An irregular border makes it easier to hide a patch to the observer.
3. Apply Joint Compound
The technique will vary slightly with what texture you are trying to match, but here are the basics.
- Mix the joint compound with a paddle and drill or small-scale portion with a paint stick or large spoon to loosen and remove bubbling.
- Test out your pattern on a spare board or extra piece of drywall until yous get the right texture. I find that first working the compound into the brush makes the pattern more than even when applying.
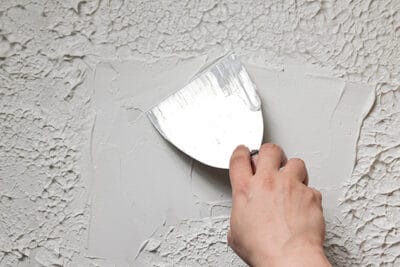
- Once your gear up to move on to the real surface area, spread the joint compound on with a putty knife beyond the area to exist patched. Try to alloy any edges with the existing texture. You aren't trying to create texture yet, just become it up on the ceiling relatively smooth. Don't exist shy with it either, put it on at roughly as thick as the existing texture.
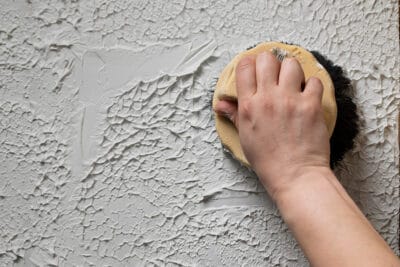
- Using your texture tool, stomp the texture into the applied articulation compound in the same style equally the do board.
- If you take a knockdown ceiling, you will accept to apply a large putty scraper to go across the texture to smooth it to the knockdown texture. Look a few minutes after the applied texture is set earlier knocking-down.
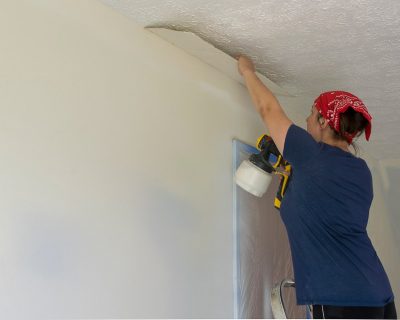
four. Paint
Once you've achieved the blueprint or texture you desire, wait overnight or longer before painting.
Pro Tip: White ceiling paint is very hard to match perfectly, so program to paint the whole ceiling unless yous don't mind a line where you patched.
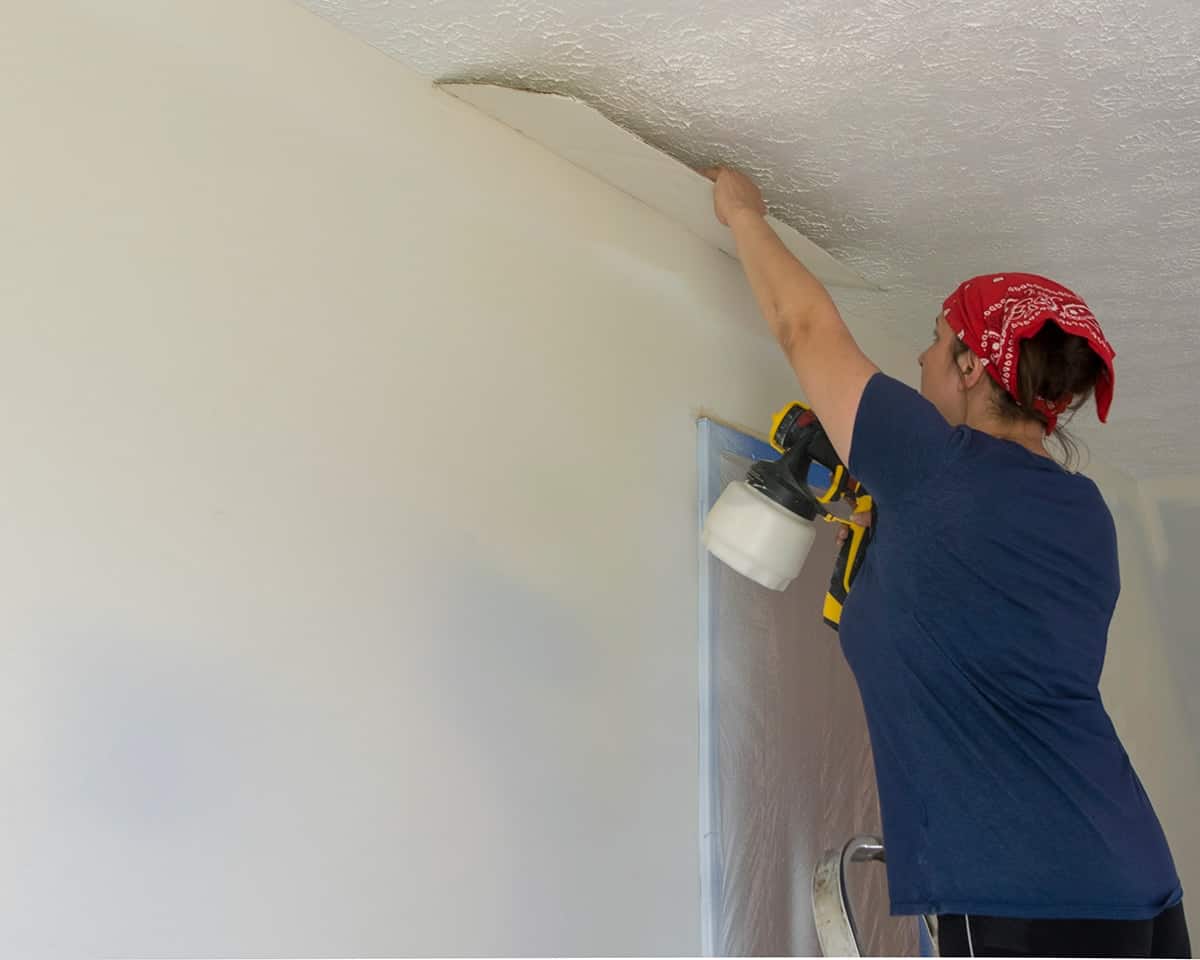
We used our handy paint sprayer to paint both the ceilings and the walls, which made it happen in maybe ⅕ the fourth dimension it would have taken! Yes, your arms will ache spray painting a ceiling, just honestly they are going to anguish with a roller.
FAQs
Are textured ceilings outdated?
Textured ceilings are indeed outdated. While they hibernate imperfections extremely well, textured ceilings attract dust and are more than difficult to paint and repair.
What is the difference between a popcorn ceiling and a textured ceiling?
Popcorn ceilings are unlike from other textured ceilings because popcorn is commonly sprayed on, whereas textured ceilings are created from applying plaster in a pattern with a decorative brush.
Do I need special paint for a textured ceiling?
There are no special requirements for a textured ceiling vs a smooth ceiling paint.
Is removing textured ceilings expensive?
Materials required to make ceilings smooth is virtually $100-150, including stripper, scrapers, and sanding materials. Even so, this chore can be extremely labor intensive if the ceilings have been painted multiple times. Truthfully, in a few cases, I take considered re-drywalling easier than removing the texture because information technology can exist so labor intensive.

Sign upwards beneath to receive updates including free printables, system tips, home improvement projects, recipes and more!
More than Painting DIY Tutorials
-

How to Spray Paint Outdoor Furniture -
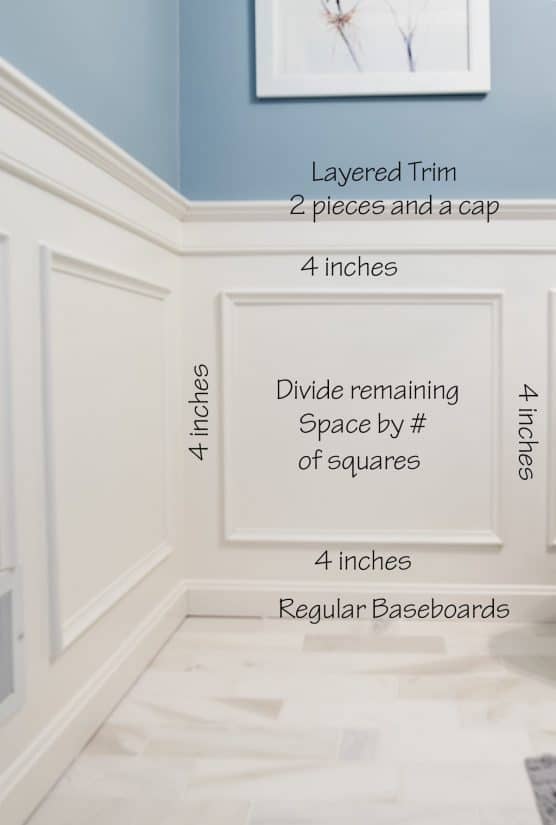
Installing Wainsccoting -

Pigment Garage Doors -
How To Pigment A Vanity
PS I honey seeing your creations! Be sure to have a photo and tag#cravingcreative on Instagram! Y'all can alsostay in touch with me through post-obit me on Instagram, Pinterest, and Subscribing to the Newsletter!
-
Wide Putty Scraper
- Stainblocking Primer
- Joint Chemical compound or Spackle
-
For castor textures, soak the brush in warm water for at least an hour, or overnight. This softens the bristles to create the correct texture for your ceiling.
-
Remove whatever loose plaster by scraping off with a dry putty knife. If you have stains, use a stain blocker like this spray stainblocker to go along the damage from bleeding into paint.
-
Employ articulation compound. Test out your design on a spare board or extra piece of drywall until you get the right texture. In one case your ready to motility on to the real area, spread the articulation compound on with a putty knife or magic mudder across the area to be patched. Effort to alloy whatsoever edges with the existing texture.
-
Using your texture tool, stomp the texture into the applied articulation chemical compound in the same fashion every bit the practice board. If you accept a knockdown ceiling, you lot volition take to employ a large putty scraper to go across the texture to smooth it downward to a knockdown texture.
-
Once you've achieved the design or texture you desire, await overnight or longer before painting.
General Tips
- The unmarried hardest office of this job is figuring out which ceiling texture type y'all take. Nosotros have a handy list in the post to compare.
- With the exception of popcorn and orange peel, all textures are applied using a corresponding castor to create the pattern. Popcorn and orange peel are made using a spray.
- An irregular border on the patch surface area makes it easier to hide a patch to the observer.
- White ceiling paint is very hard to match perfectly, so program to pigment the whole ceiling unless you lot don't mind a line where you lot patched.

Source: https://www.cravingsomecreativity.com/how-to-repair-textured-ceiling/
Posted by: wicknessichaved1968.blogspot.com
0 Response to "How To Make Repairs On Ceiling Knock Down Finish"
Post a Comment